Dark Chocolate Sea Salt Nut Bars-Easy Recipe
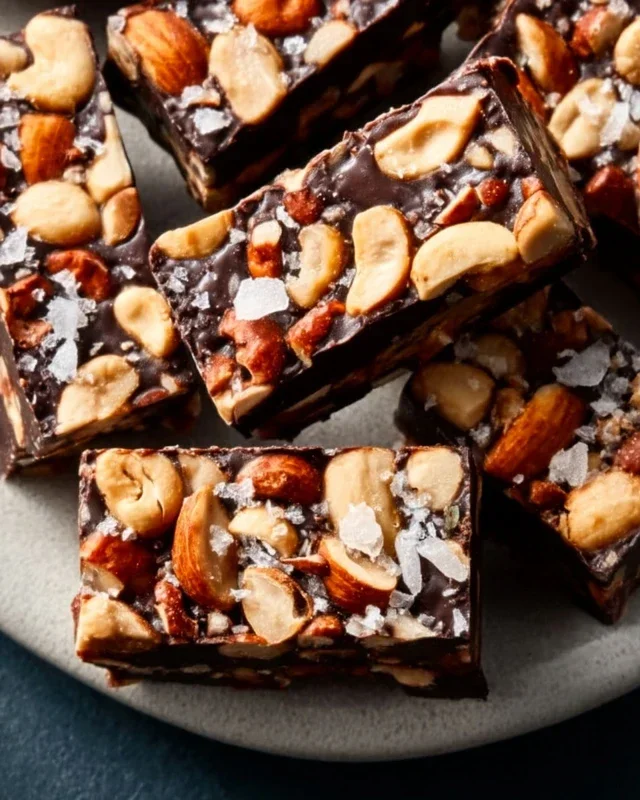
Dark Chocolate and Sea Salt Nut Bars. Let’s be honest, who can resist the allure of a perfectly balanced sweet and salty treat? I know I can’t. These Dark Chocolate and Sea Salt Nut Bars are my go-to when that craving hits, and for good reason. They’re incredibly satisfying, hitting all the right notes: the deep, rich bitterness of dark chocolate, the delightful crunch of toasted nuts, and that little spark of sea salt that makes everything sing. What makes these bars truly special is their incredible versatility. They’re the ideal midday pick-me-up, a sophisticated dessert that’s surprisingly easy to make, or even a welcome addition to your morning coffee ritual. Forget those overly processed store-bought bars; these homemade beauties are packed with wholesome goodness and bursting with flavor, and I can’t wait to share the simple magic of creating them with you.
Dark Chocolate and Sea Salt Nut Bars
These Dark Chocolate and Sea Salt Nut Bars are my go-to for a quick, satisfying, and surprisingly healthy treat. They strike the perfect balance between crunchy nuts, sweet and slightly chewy caramel notes from the brown rice syrup, and that decadent hit of dark chocolate, all elevated by a sprinkle of sea salt. I love making a batch of these on a Sunday afternoon, and they’re usually gone by Tuesday! They’re perfect for a mid-afternoon energy boost, a post-workout snack, or even a slightly more wholesome dessert. The beauty of these bars is their adaptability. While I’ve listed my favorite nut combination, feel free to experiment with pecans, walnuts, or even macadamia nuts. The key is a good mix of textures and flavors. Let’s get started!
Ingredients:
Getting Started: Preparation is Key
Before we dive into the mixing and baking, let’s get our workspace and ingredients ready. This will make the whole process smoother and more enjoyable.
First, line an 8×8 inch baking pan with parchment paper, leaving an overhang on the sides. This overhang will be your handy lifter, allowing you to easily remove the entire slab of bars once they’re set. Make sure the parchment paper covers the bottom and sides of the pan. Next, lightly grease the parchment paper with a touch of oil or cooking spray. This ensures that nothing sticks and makes for clean cuts later on.
Now, let’s talk about the nuts. If your nuts are raw and unsalted, it’s a good idea to lightly toast them. You can do this in a dry skillet over medium heat for a few minutes until they’re fragrant, or spread them on a baking sheet and toast them in a preheated oven at 350°F (175°C) for about 8-10 minutes. Toasting brings out their natural oils and enhances their flavor and crunch. Once toasted, let them cool completely. You can leave them whole, or roughly chop them if you prefer smaller nut pieces in your bars. I often do a combination of both for interesting texture.
Mixing the Base
In a large bowl, combine your prepared nuts and the puffed rice. Give them a good stir to ensure everything is evenly distributed. This forms the crunchy foundation of our bars. The puffed rice adds a lovely lightness and crispiness that contrasts beautifully with the denser nuts.
Creating the Binder
Now, let’s make the sticky, sweet binder that holds everything together. In a small saucepan, gently heat the brown rice syrup over low heat. You don’t want to boil it vigorously, just warm it enough so it becomes more fluid and easier to mix. Once it’s warm and pourable, stir in the vanilla extract and the 1/2 teaspoon of sea salt. Whisk them in until they’re fully incorporated. The vanilla adds a warm, comforting aroma and flavor, while the sea salt is crucial for cutting through the sweetness and enhancing the overall taste.
Pour this warm syrup mixture over the nut and puffed rice mixture in the large bowl. Using a sturdy spatula or spoon, mix thoroughly until all the nuts and puffed rice are evenly coated. This might take a bit of effort, as the syrup can be a bit sticky, but it’s important to get every piece coated for a cohesive bar.
Pressing the Bars
Transfer the coated nut and puffed rice mixture into your prepared baking pan. Now, this is where you’ll need a little elbow grease. Use the back of your spatula, or even a flat-bottomed glass or measuring cup, to firmly press the mixture down into an even layer. The firmer you press, the more likely your bars are to hold together well. Aim for a dense, compact layer. If you’re using the overhang of the parchment paper, you can also gently press down on that to help compact the mixture from above.
Melting the Chocolate and Finishing Touches
While the base is pressed, let’s get our chocolate ready. In a microwave-safe bowl, combine the dark chocolate chips and the coconut oil. Microwave in 30-second intervals, stirring well after each interval, until the chocolate is almost completely melted. Stir until smooth and glossy. The coconut oil helps the chocolate melt smoothly and gives it a nice sheen. Alternatively, you can melt the chocolate and coconut oil in a double boiler.
Once the chocolate is melted and smooth, drizzle it evenly over the pressed nut mixture in the pan. Use your spatula to spread the chocolate into an even layer, covering the entire surface. This is where the magic happens!
Now, for that final touch that elevates these bars from good to amazing: the flaky sea salt. Sprinkle a generous pinch of flaky sea salt over the melted chocolate. This creates those delightful little bursts of saltiness that perfectly complement the rich dark chocolate and the nutty base. If you’re not using flaky salt, a fine sea salt will work, but flaky salt provides a wonderful textural contrast.
Setting and Slicing
Now, the hardest part: waiting! Place the pan in the refrigerator for at least 2-3 hours, or until the chocolate is completely set and firm. The chilling process allows the brown rice syrup to firm up, holding all the ingredients together, and the chocolate to harden.
Once chilled, use the parchment paper overhang to carefully lift the entire slab out of the pan. Place it on a cutting board. Using a sharp knife, cut the slab into your desired bar size. For cleaner cuts, you can warm your knife slightly under hot water and dry it thoroughly before slicing.
These Dark Chocolate and Sea Salt Nut Bars are best stored in an airtight container in the refrigerator. They’ll stay fresh for up to a week, though I doubt they’ll last that long! Enjoy every delicious bite.
Conclusion:
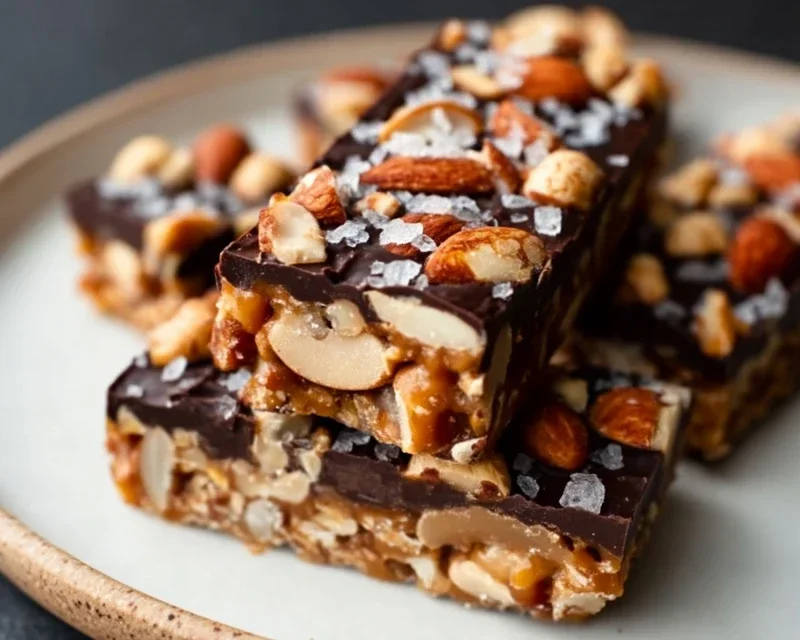
These Dark Chocolate and Sea Salt Nut Bars are an absolute triumph! They strike the perfect balance between rich, decadent dark chocolate and the satisfying crunch of toasted nuts, all elevated by that hint of sea salt that makes every bite sing. They’re incredibly versatile, making them ideal for a quick breakfast on the go, a satisfying afternoon pick-me-up, or even a healthier homemade dessert. The simplicity of the recipe means you don’t need to be a baking pro to achieve fantastic results, and the customization options mean you can tailor them to your exact preferences.
I wholeheartedly encourage you to give these Dark Chocolate and Sea Salt Nut Bars a try! You’ll be rewarded with delicious, wholesome treats that are far superior to anything store-bought. Enjoy them chilled for a firmer texture, or at room temperature for a chewier experience. Feel free to get creative with your nut choices or add-ins like dried cranberries or cacao nibs. You won’t be disappointed!
Frequently Asked Questions:
Can I use different types of nuts?
Absolutely! This recipe is wonderfully forgiving. Almonds, walnuts, pecans, or even cashews would all work beautifully. You can also mix and match your favorite nuts for a complex flavor profile.
How long do these bars last?
Stored in an airtight container in the refrigerator, these bars will stay fresh for up to a week. For longer storage, you can wrap them individually and freeze them for up to three months.
What if I don’t have dark chocolate chips?
You can chop up a dark chocolate bar into small pieces or use dark chocolate chunks. The key is to use good quality dark chocolate that you enjoy eating on its own.
Dark Chocolate and Sea Salt Nut Bars
Chewy and satisfying no-bake bars packed with nuts, puffed rice, and drizzled with dark chocolate and sea salt.
Ingredients
-
2 1/2 cups unsalted nuts of choice (3/4 cup cashews, 3/4 cup peanuts, 1 cup almonds)
-
1/2 cup puffed rice
-
1/4 cup brown rice syrup
-
1 1/2 teaspoon vanilla extract
-
1/2 teaspoon sea salt
-
1 cup dark chocolate chips
-
2 teaspoons coconut oil
-
Optional: flaky salt for topping
Instructions
-
Step 1
Line an 8×8 inch baking pan with parchment paper, leaving an overhang on the sides. -
Step 2
In a large bowl, combine the nuts and puffed rice. -
Step 3
In a small saucepan over medium heat, warm the brown rice syrup and vanilla extract until just combined. Stir in the sea salt. -
Step 4
Pour the warm syrup mixture over the nuts and puffed rice. Stir well until everything is evenly coated. -
Step 5
Press the mixture firmly into the prepared baking pan. -
Step 6
In a microwave-safe bowl, melt the dark chocolate chips with the coconut oil in 30-second intervals, stirring in between, until smooth. Alternatively, use a double boiler. -
Step 7
Pour the melted chocolate over the nut mixture. Spread evenly with a spatula. Sprinkle with flaky salt if desired. -
Step 8
Refrigerate for at least 1 hour, or until the chocolate is set. Cut into bars and serve.
Important Information
Nutrition Facts (Per Serving)
It is important to consider this information as approximate and not to use it as definitive health advice.
Allergy Information
Please check ingredients for potential allergens and consult a health professional if in doubt.