Crispy Chicken Fried Chicken Recipe
Chicken Fried Chicken is more than just a meal; it’s a culinary hug, a symphony of textures and flavors that consistently earns its place as a comfort food cbeef hampion. There’s something undeniably magical about that perfectly crisp, golden-brown exterior giving way to tender, juicy chicken breast within. It’s this irresistible contrast, coupled with the savory, peppery notes of the seasoned coating and often a luscious, creamy gravy, that makes Chicken Fried Chicken such a beloved classic across generations. Whether you’re craving a taste of Southern hospitality or simply seeking a deeply satisfying dish to brighten your day, this recipe delivers pure, unadulterated joy. It’s the kind of meal that brings smiles to the table and leaves everyone feeling wonderfully content.
Why We Can’t Get Enough
The Perfect Harmony of Crunch and Tenderness
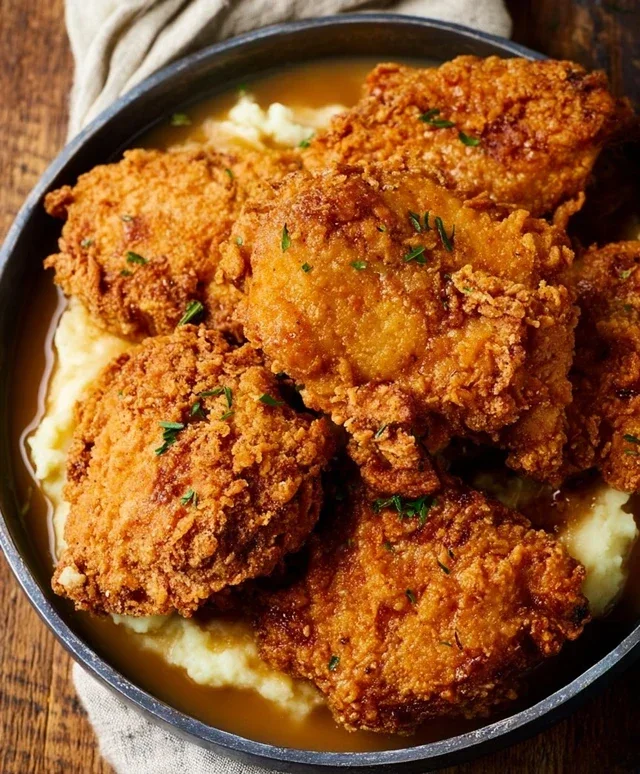
Chicken Fried Chicken
There’s something incredibly satisfying about a perfectly executed piece of Chicken Fried Chicken. It’s comfort food at its finest, with that crispy, golden-brown exterior giving way to tender, juicy chicken. The creamy, peppery gravy is the crowning glory, making every bite an experience. This recipe delivers on all fronts, creating a dish that’s sure to become a family favorite. We’re going to walk through it step-by-step, so even if you’re new to frying, you’ll end up with fantastic results.
Ingredients:
Preparing the Chicken and Dredgin extractg Station
The first step is to get our chicken ready and set up our dredgin extractg station. This makes the breading process smooth and efficient. Take your thin-sliced chicken breasts and ensure they are relatively uniform in size and thickness. This helps them cook evenly. If your chicken breasts are a bit thicker, you can gently pound them to an even thickness, about 1/2 inch. This not only ensures even cooking but also makes them more tender.
Next, we create our dry dredge mixture. In a shallow bowl or dish, combine 2 cups of flour with the baking powder, baking soda, salt, pepper, and garlic powder. Whisk everything together thoroughly. The baking powder and baking soda are key here; they react with the buttermilk and create a wonderfully light and crispy coating. This is the foundation of our delicious crust.
In a separate shallow bowl, whisk together the buttermilk, the egg, and the hot sauce. The hot sauce adds a subtle kick and helps to tenderize the chicken even further. This wet mixture will help the dry dredge adhere beautifully to the chicken. Having both a dry and wet station ready before you start breading prevents the flour from getting clumpy.
Breading the Chicken
Now comes the fun part: breading the chicken! Take one piece of chicken at a time and first dip it into the buttermilk mixture, ensuring it’s fully coated. Let any excess drip back into the bowl. Then, transfer the chicken to the dry flour mixture. Press the flour onto the chicken firmly, making sure every nook and cranny is covered. You want a nice, thick coating of the seasoned flour. Don’t be shy with the coating; this is what creates that irresistible crunch. Once coated, gently shake off any excess flour and place the breaded chicken on a wire rack set over a baking sheet. Repeat this process with all the chicken pieces. Allowing the breaded chicken to rest on the wire rack for about 10-15 minutes helps the coating adhere better and prevents it from falling off during frying. This resting period is often called “setting” the breading.
Frying the Chicken
It’s time to get that oil hot and fry our chicken to golden perfection. You’ll need a heavy-bottomed skillet or a Dutch oven for frying. Pour enough oil into the skillet to reach a depth of about 1-2 inches. Heat the oil over medium-high heat until it reaches approximately 350°F (175°C). If you don’t have a thermometer, you can test the oil by dropping a tiny bit of the flour mixture into it. It should sizzle vigorously and float to the surface immediately.
Carefully place the breaded chicken pieces into the hot oil, being careful not to overcrowd the pan. Overcrowding will lower the oil temperature too much, resulting in soggy chicken instead of crispy. You may need to fry the chicken in batches. Fry the chicken for about 4-6 minutes per side, or until it’s golden brown and cooked through. The internal temperature of the chicken should reach 165°F (74°C). Use tongs to carefully flip the chicken pieces. As each batch is done, remove it from the oil and place it back on the wire rack to drain. This allows air to circulate and keeps the chicken crispy.
Making the Creamy Gravy
While the last batch of chicken is frying or draining, we can get started on the gravy. This is where that reserved oil from frying comes in handy. Carefully pour out about 1/4 cup of the hot oil from the skillet into a heatproof bowl, leaving the rest in the pan. This seasoned oil will add an incredible depth of flavor to our gravy.
To the skillet with the reserved 1/4 cup of oil, add 1/3 cup of flour. Whisk this together constantly over medium heat, creating a roux. Cook the roux for about 1-2 minutes, stirring continuously, until it turns a light golden brown. This cooks out the raw flour taste. Gradually whisk in the 2 cups of milk, a little at a time, making sure to whisk out any lumps before adding more milk. Continue to whisk until the gravy begin extracts to thicken. Once thickened to your desired consistency, season generously with salt and pepper to taste. Taste and adjust the seasoning as needed – gravy is all about getting that balance of creamy, savory, and peppery just right.
Serving Your Masterpiece
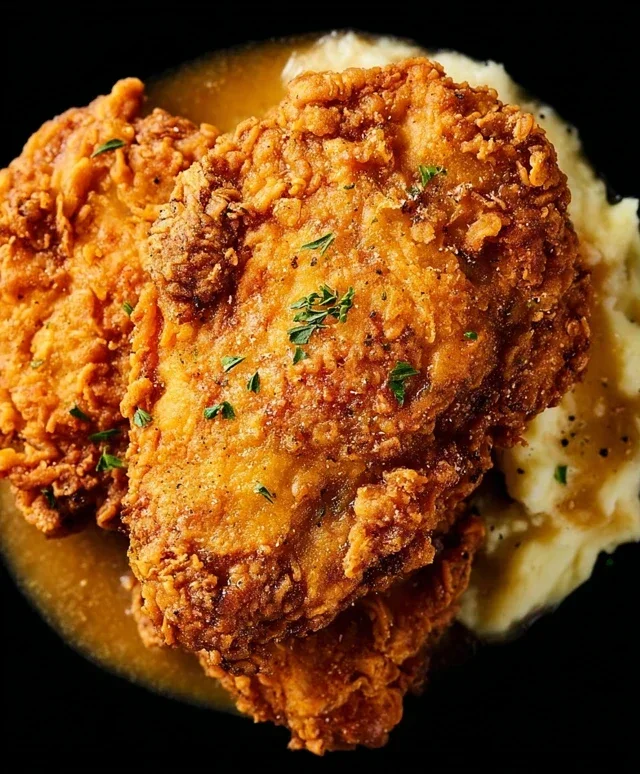
Once your chicken is fried to a beautiful golden brown and your gravy is rich and creamy, it’s time to serve. Place a few pieces of the crispy Chicken Fried Chicken on a plate. Spoon a generous amount of the hot, peppery gravy over the top. This dish is absolutely divine served with mashed potatoes, a side of green beans, or even just a simple biscuit. The contrast between the crunchy chicken and the velvety gravy is simply irresistible. Enjoy every delicious bite of this classic comfort food!
Conclusion:
There you have it – your guide to achieving ultimate crispy, juicy, and incredibly satisfying Chicken Fried Chicken! This recipe isn’t just about a meal; it’s about creating a comforting, crowd-pleasing experience that brings smiles to everyone’s faces. The magic lies in the perfect golden-brown crust, achieved through careful breading and frying, giving way to tender, flavorful chicken that practically melts in your mouth. It’s truly a dish that embodies homestyle cooking at its finest.
What makes this Chicken Fried Chicken so great? It’s the beautiful balance of textures and flavors – the crunch of the seasoned coating, the savory goodness of the chicken, and the creamy, delicious gravy that ties it all together. Don’t be intimidated by the frying process; with a little attention, you’ll be a pro in no time. Serve it alongside your favorite mashed potatoes, a crisp green salad, or some buttered corn for a complete and hearty meal. For variations, consider adding a pinch of cayenne pepper to your flour mixture for a subtle kick, or try a buttermilk marinade for an extra tender chicken.
I wholeheartedly encourage you to give this recipe a try. It’s a rewarding culinary adventure that will undoubtedly become a family favorite. Gather your ingredients, put on your apron, and get ready to impress yourself and your loved ones with this classic dish!
Frequently Asked Questions:
Can I bake this instead of frying for a healthier option?
While the deep-fried method delivers the signature crispy texture, you can achieve a lighter version by baking. For best results, preheat your oven to 400°F (200°C). After breading your chicken, place it on a wire rack set inside a baking sheet. Lightly spray or brush the breaded chicken with oil. Bake for 25-30 minutes, flipping halfway through, until golden brown and cooked through. It won’t be quite as crispy as fried, but it’s a delicious alternative.
What is the best oil to use for frying?
For frying Chicken Fried Chicken, a neutral oil with a high smoke point is ideal. Canola oil, vegetable oil, or peanut oil are excellent choices. They allow the chicken to cook evenly without imparting any unwanted flavors and can withstand the high temperatures needed for that perfect golden crust.
Chicken Fried Chicken
Crispy fried chicken served with a creamy milk gravy. A classic comfort food dish.
Ingredients
-
6-8 thin sliced chicken breasts
-
2 cups flour
-
2 tsp baking powder
-
1 tsp baking soda
-
1 tsp salt
-
1 tsp pepper
-
1 tsp garlic powder
-
1 1/2 cup buttermilk
-
1 egg
-
1 Tbs hot sauce
-
Oil for frying
-
1/4 cup reserved oil from frying
-
1/3 cup flour
-
2 cup milk
-
Salt & pepper
Instructions
-
Step 1
In a shallow dish, whisk together 2 cups flour, baking powder, baking soda, salt, pepper, and garlic powder. -
Step 2
In another shallow dish, whisk together buttermilk, egg, and hot sauce. -
Step 3
Dip each chicken breast into the buttermilk mixture, then dredge in the flour mixture, ensuring it is fully coated. Set aside. -
Step 4
Heat enough oil in a large skillet over medium-high heat to generously cover the bottom. Once hot, carefully add the coated chicken breasts, being careful not to overcrowd the pan. Fry for about 4-5 minutes per side, until golden brown and cooked through. Remove chicken and place on a wire rack to drain. -
Step 5
Pour out all but 1/4 cup of the reserved oil from the skillet. Return the skillet to medium heat. Whisk in 1/3 cup flour and cook for 1-2 minutes, stirring constantly, to form a roux. -
Step 6
Gradually whisk in the milk, stirring until smooth and thickened. Season the gravy with salt and pepper to taste. Simmer for a few minutes until desired consistency is reached. -
Step 7
Serve the fried chicken hot, topped with the creamy milk gravy.
Important Information
Nutrition Facts (Per Serving)
It is important to consider this information as approximate and not to use it as definitive health advice.
Allergy Information
Please check ingredients for potential allergens and consult a health professional if in doubt.