Crispy Baked Zucchini Chips- Easy Healthy Snack
Baked zucchini chips are the answer to all your crunchy snack cravings, guilt-free! If you’re anything like me, the search for a satisfyingly crispy treat that doesn’t send you into a sugar or salt spiral is a never-ending quest. That’s precisely why these baked zucchini chips have become an absolute staple in my kitchen. Forget the greasy, heavy feeling of traditional chips; these delights offer an incredible crunch with a light, refreshing bite that truly celebrates the humble zucchini. What makes them so special? It’s their simplicity, their versatility, and the sheer joy of transforming a readily available summer vegetable into a crowd-pleasing appetizer or a healthy afternoon pick-me-up. We’ll walk through how to achieve that perfect crispness every single time, ensuring your baked zucchini chips are an instant hit.
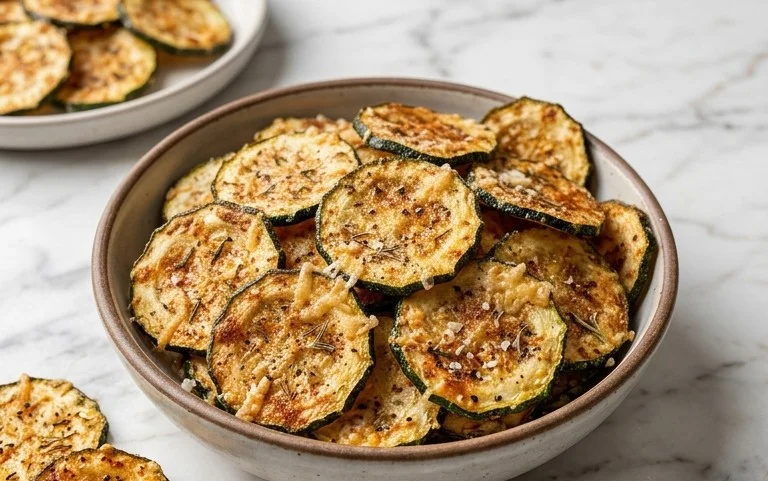
Baked Zucchini Chips
Are you looking for a delicious, healthy, and surprisingly addictive snack? Look no further than these baked zucchini chips! Forget the greasy, store-bought chips; these are crisp, flavorful, and a fantastic way to use up that garden bounty (or a great excuse to pick up a couple of fresh zucchini from the market). They’re incredibly easy to make, and the satisfaction of biting into a perfectly baked, savory chip is unparalleled. This recipe is a game-changer for anyone who loves a good crunch without the guilt.
Ingredients:
Cooking Instructions:
First things first, we need to prepare our star ingredient: the zucchini. The key to getting perfectly crispy zucchini chips, rather than soggy ones, is to remove as much moisture as possible.
Step 1: Slicing and Salting the Zucchini
Begin extract by washing your zucchini thoroughly. Then, using a sharp knife or a mandoline slicer (if you have one and are comfortable using it, a mandoline will give you incredibly uniform slices), slice the zucchini into rounds that are about 4-5 millimeters thick. Aim for consistency in thickness; this is crucial for even baking. Thicker slices will likely remain too soft, while thinner slices might burn before they crisp up. Once sliced, lay the zucchini rounds in a single layer on a clean kitchen towel or paper towels. Sprinkle both sides of the zucchini slices generously with about 1/4 teaspoon of the salt. Let them sit for at least 15-20 minutes. You’ll notice that water starts to bead up on the surface of the zucchini. This is the magic happening – drawing out the excess moisture. After the resting period, use more paper towels to pat each slice completely dry, pressing gently to absorb all the released liquid. The drier the zucchini, the crispier your chips will be! This step is non-negotiable if you want truly excellent zucchini chips.
Step 2: Creating the Flavorful Coating
Now it’s time to bring on the flavor! In a medium bowl, combine the grated parmesan cheese, garlic powder, paprika, and the remaining 1/4 teaspoon of salt. If you like a little kick, this is also the time to add some freshly ground black pepper. Whisk everything together until it’s well combined. This mixture will be our delicious, savory coating for the zucchini. Ensure your parmesan cheese is finely grated; this helps it adhere better to the zucchini and create a lovely, golden crust.
Step 3: Coating the Zucchini Rounds
Take your thoroughly dried zucchini slices and gently toss them in the parmesan mixture. You can do this in batches to ensure each slice is evenly coated without overcrowding the bowl. Make sure both sides of each zucchini round are well-covered with the cheesy, herby goodness. You want a nice, even layer of the parmesan mixture. Don’t be afraid to get your hands in there to help coat them; it’s the most effective way! If any slices seem a little bare, simply pick them up and roll them around in the mixture again until they look adequately seasoned.
Step 4: Arrangin extractg for Baking
Preheat your oven to 400°F (200°C). Line two large baking sheets with parchment paper. This is a crucial step to prevent sticking and make cleanup a breeze. Arrange the coated zucchini slices in a single layer on the prepared baking sheets. Make sure there is a little space between each chip. Overcrowding the baking sheets will cause the chips to steam rather than bake and crisp up, so it’s better to use two sheets if necessary. Ensure each chip is lying flat so it cooks evenly.
Step 5: Baking to Perfection
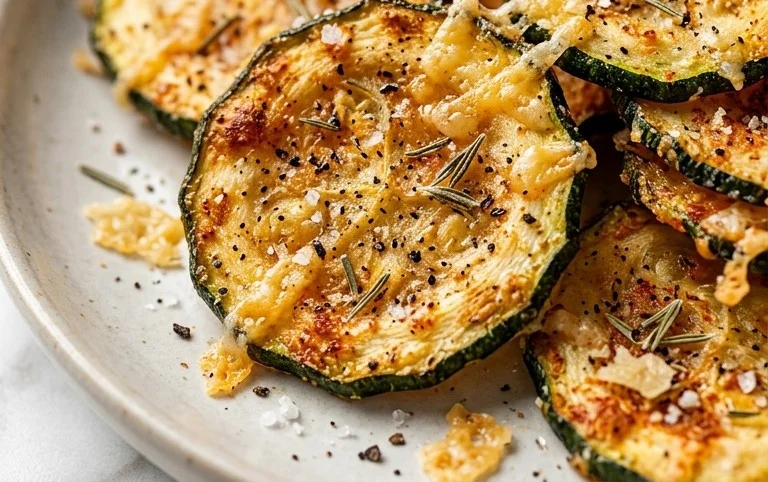
Place the baking sheets in the preheated oven. Bake for 10-15 minutes. At the 10-minute mark, carefully check on the chips. You’re looking for them to be golden brown and slightly crisp around the edges. The exact baking time will depend on your oven and the thickness of your zucchini slices. If some chips are browning faster than others, you can carefully remove them from the baking sheet to prevent burning while the others continue to bake. Once they’ve reached your desired level of crispness, carefully remove the baking sheets from the oven. You might need to flip them halfway through baking if your oven has hot spots, but often they’ll crisp up nicely without flipping. Let the zucchini chips cool on the baking sheets for a few minutes before transferring them to a wire rack to cool completely. As they cool, they will continue to crisp up further.
Enjoy these delightful baked zucchini chips as a healthy snack on their own, or serve them with your favorite dip like ranch, hummus, or a light marinara sauce. They are best enjoyed fresh, but any leftovers can be stored in an airtight container at room temperature for a day or two, although they may lose some of their crispness.
Conclusion:
There you have it – your ultimate guide to making incredibly delicious baked zucchini chips! We’ve explored how simple ingredients can transform into a surprisingly satisfying and healthy snack. These chips are a testament to how easy it is to create something flavorful and guilt-free right in your own kitchen. They’re perfect for satisfying those crunchy cravings without the grease of traditional fried snacks, making them a fantastic addition to your healthy eating repertoire. I truly encourage you to give this baked zucchini chips recipe a try; you might just find your new go-to snack!
Serving these beauties is as versatile as making them. They’re fantastic on their own as a light appetizer, a healthy side dish for sandwiches or wraps, or even crum extractbled over salads for an added textural element. Feel free to experiment with different seasonings to personalize your chips. Think about a smoky paprika blend, a zesty garlic herb mixture, or even a spicy chili powder for an extra kick. The possibilities are endless, and the satisfaction of creating your own healthy treats is immense.
Frequently Asked Questions:
Can I make these zucchini chips ahead of time?
Yes, you can! For the best crispness, it’s ideal to enjoy them fresh. However, you can bake them a few hours in advance. Store them in a single layer on a paper towel-lined plate or a loosely covered container at room temperature to maintain some crispness. If they lose some of their crunch, a quick minute or two in a preheated oven can revive them.
What if my zucchini chips are not crispy?
Achieving ultimate crispiness often comes down to a few key factors. Ensure your zucchini slices are cut very thinly and evenly. Pat them thoroughly dry after washing to remove excess moisture, as this is crucial. Don’t overcrowd the baking sheet; give each chip ample space for air circulation. Also, consider increasing the oven temperature slightly or extending the baking time, keeping a close eye to prevent burning. Sometimes, a second flip halfway through baking can help too.
Baked Zucchini Chips
Crispy and savory baked zucchini chips, a healthier alternative to potato chips.
Ingredients
-
2 medium zucchini (sliced into rounds (4-5 mm thickness))
-
1/4 cup olive oil
-
2/3 cup grated parmesan cheese
-
1/2 tsp garlic powder
-
1/4 tsp paprika
-
1/2 tsp salt
-
black pepper to taste
Instructions
-
Step 1
Preheat your oven to 400°F (200°C). Line two baking sheets with parchment paper. -
Step 2
Slice the zucchini into rounds of 4-5 mm thickness. Pat them thoroughly dry with paper towels to remove excess moisture. -
Step 3
In a bowl, whisk together the olive oil, garlic powder, paprika, and salt. Add black pepper if desired. -
Step 4
In a separate shallow dish, place the grated parmesan cheese. -
Step 5
Dip each zucchini slice into the olive oil mixture, ensuring it’s lightly coated, then dredge it in the parmesan cheese, pressing gently to adhere. -
Step 6
Arrange the coated zucchini slices in a single layer on the prepared baking sheets, ensuring they do not overlap. -
Step 7
Bake for 15-20 minutes, or until the edges are golden brown and crispy. Flip the chips halfway through baking for even crispiness. -
Step 8
Let the chips cool on the baking sheets for a few minutes before serving. They will crisp up further as they cool.
Important Information
Nutrition Facts (Per Serving)
It is important to consider this information as approximate and not to use it as definitive health advice.
Allergy Information
Please check ingredients for potential allergens and consult a health professional if in doubt.