Easy Chocolate Swiss Roll Recipe-Decadent & Delicious
Easy Chocolate Swiss Roll recipes are a game-changer for anyone who’s ever dreamed of creating a show-stopping dessert without the fuss. There’s something undeniably magical about a light, airy sponge cake rolled up with a luscious filling. We adore this delightful treat because it looks incredibly impressive, yet it’s surprisingly simple to master. What makes this particular easy Chocolate Swiss Roll so special? It’s the perfect balance of rich, decadent chocolate flavour in the sponge and a creamy, sweet filling that melts in your mouth. Forget intimidating pastry techniques; this recipe is designed for home bakers of all levels. Imagin extracte the delight on your loved ones’ faces when you present this beautifully swirled masterpiece, all while knowing you achieved it with minimal stress. Get ready to impress yourself and everyone around you with this wonderfully achievable dessert!
Easy Chocolate Swiss Roll
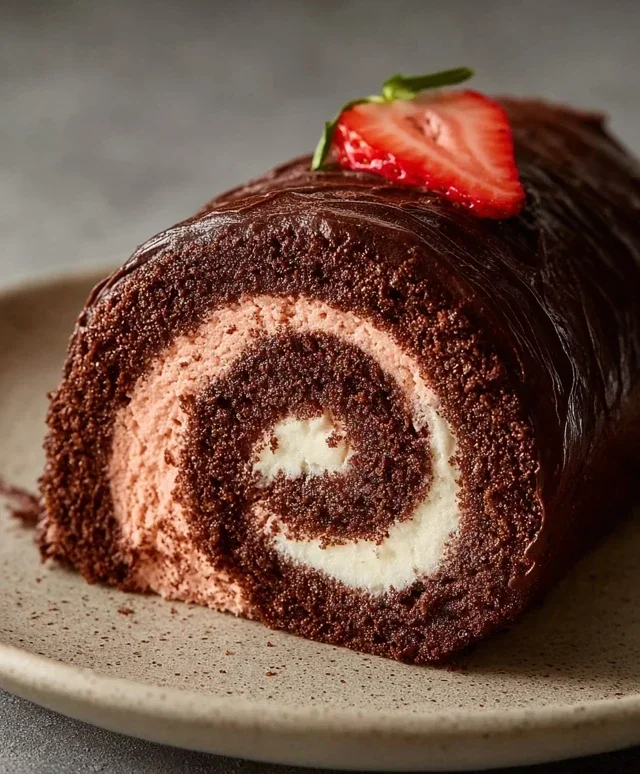
Craving a decadent chocolate treat that’s surprisingly easy to make? This Easy Chocolate Swiss Roll is your answer! It’s a showstopper that looks impressive but is incredibly forgiving, making it perfect for bakers of all levels. We’ll be using a clever combination of alternative flours and aquafaba to create a light, airy, and wonderfully moist cake that rolls like a dream. The rich chocolate sponge is complemented by a creamy, tangy strawberry “buttercream” – all completely dairy-free and delicious. Get ready to impress yourself and your loved ones with this delightful dessert!
Ingredients:
Instructions:
1. Prepare the Chocolate Sponge
First things first, let’s get our oven preheated to 175°C (350°F). It’s crucial that your oven is at the correct temperature for the cake to bake evenly. Line a 10×15 inch jelly roll pan with parchment paper, ensuring it fits snugly. Then, grease the parchment paper lightly. This will prevent sticking and make rolling much easier later. In a medium bowl, whisk together the oat flour, cassava flour, 30g of cocoa powder, arrowroot starch, baking powder, and baking soda. Whisking these dry ingredients thoroughly ensures that the leavening agents are evenly distributed, leading to a consistent rise in your cake. In a separate, larger bowl, combine the aquafaba and 100g of the granulated sugar (or coconut sugar). Using an electric mixer, whip this mixture on high speed for about 5-7 minutes, or until it forms stiff, glossy peaks, similar to meringue. This aquafaba “meringue” is what gives our Swiss roll its incredible lightness and airy texture.
2. Combine Wet and Dry Ingredients
Now, to the aquafaba meringue, gently fold in the unsweetened applesauce and dairy-free yogurt. Fold means to gently mix with a spatula in a sweeping motion, trying not to deflate the airy meringue. You want to maintain as much of that lightness as possible. Gradually add the dry ingredients to the wet ingredients, folding gently until just combined. Be careful not to overmix, as this can develop the gluten in the flours and make the cake tough. The batter should be smooth and free of any large lumps of dry ingredients. It will be a rich, dark chocolate batter. Pour this batter into your prepared jelly roll pan and spread it evenly with a spatula. Try to get the batter as flat and consistent as possible, as this will help it bake evenly and roll without cracking.
3. Baking the Chocolate Cake
Bake the cake in the preheated oven for 12-15 minutes. Keep a close eye on it! You’re looking for the cake to be slightly firm to the touch and to have sprung back when lightly pressed. It should also be pulling away slightly from the sides of the pan. Overbaking is the enemy of a good Swiss roll, as it will dry out the cake and make it prone to cracking when you try to roll it. While the cake is baking, lay a clean kitchen towel (a slightly linty one is good for catching stray crum extractbs!) flat on your work surface and generously dust it with the 2 tbsp of cocoa powder. This will prevent the cake from sticking to the towel and add an extra touch of chocolatey goodness. Once the cake is baked, immediately invert it onto the prepared, cocoa-dusted towel. Carefully peel off the parchment paper. Don’t worry if there are a few minor cracks; they’ll be hidden by the filling. Starting from the short end of the cake, and working with the towel, gently roll the warm cake up. Let it cool completely in the rolled shape on a wire rack. This cooling and rolling process is essential for setting the shape of the Swiss roll.
4. Crafting the Strawberry “Buttercream”
While the cake is cooling, let’s whip up our delicious strawberry filling. In a large bowl, beat the room temperature vegan butter until it’s light and fluffy. This usually takes about 3-5 minutes with an electric mixer. Add the remaining 100g of granulated sugar (or coconut sugar) and continue to beat until well combined and creamy. Now, it’s time for the stars of the show! Add the pulsed freeze-dried strawberries to the butter mixture. The freeze-dried strawberries provide an intense strawberry flavor and a beautiful pink hue without adding excess moisture that could make the filling too soft. If your coconut cream from the can is solid at room temperature, scoop out the firm coconut fat from the top of the can. Add this coconut fat to the bowl. Beat everything together until the mixture is smooth and resembles a thick buttercream. If it seems too soft, you can pop it in the fridge for about 15-20 minutes to firm up before spreading. Taste and adjust sweetness if needed.
5. Assembling and Finishing Your Masterpiece
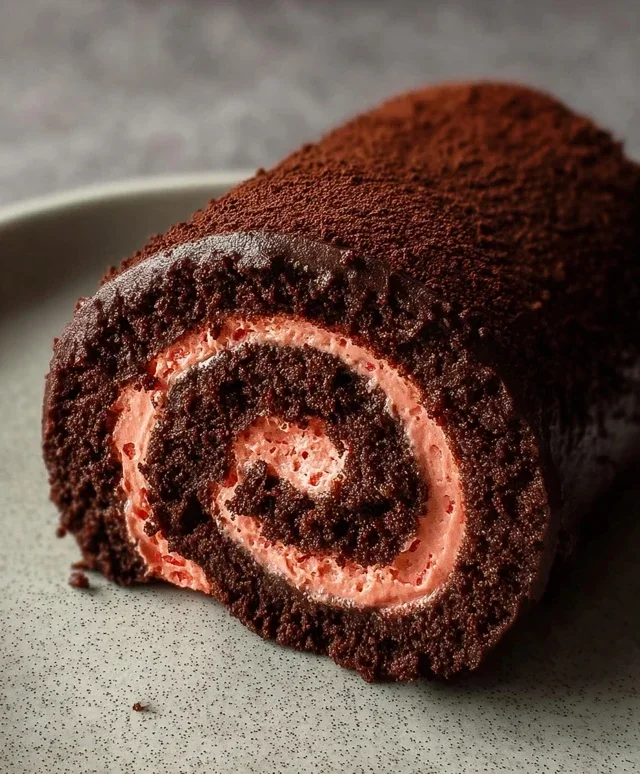
Once the chocolate cake has cooled completely, gently unroll it. Be careful, but don’t be afraid to unroll it fully. Spread the strawberry “buttercream” evenly over the entire surface of the cake, leaving a small border around the edges. Arrange the sliced strawberries over the filling. Now, re-roll the cake, this time without the towel, starting from the same short end you began with. Roll it snugly but without pressing too hard. Place the rolled Swiss roll seam-side down on a serving platter. For an extra flourish, you can dust the top with a little more cocoa powder or a sprinkle of the pulsed freeze-dried strawberries. Chill the Swiss roll in the refrigerator for at least 30 minutes to allow the filling to set properly. This also makes it easier to slice. When you’re ready to serve, slice the Swiss roll into thick portions with a sharp knife. Enjoy this delightful, homemade chocolate creation!
Conclusion:
And there you have it! My Easy Chocolate Swiss Roll recipe is your ticket to impressive-looking dessert without the fuss. It’s incredibly forgiving, moist, and delivers that rich chocolatey goodness everyone adores. The beauty of this recipe lies in its simplicity; you don’t need advanced baking skills to achieve a perfect, beautifully rolled cake. This Easy Chocolate Swiss Roll is perfect for any occasion, from a casual afternoon treat to a showstopper at your next gathering. I love serving it simply dusted with powdered sugar, or alongside a scoop of vanilla ice cream or fresh berries. For those feeling adventurous, consider adding a swirl of whipped cream to the filling or a drizzle of ganache over the top. I truly hope you give this delightful recipe a try. You’ll be surprised at how easily you can create a dessert that tastes like it came from a fancy bakery!
Frequently Asked Questions:
Why did my Swiss roll crack when I rolled it?
Don’t worry if your Swiss roll cracks a little – it happens! Often, it’s due to rolling it too tightly when it’s too hot, or if the cake itself is a bit dry. Ensuring the cake cools sufficiently and using a clean kitchen towel to help with the initial roll can help prevent this. A little crack is easily disguised with frosting or powdered sugar!
Can I make the filling ahead of time?
Absolutely! The chocolate whipped cream filling can be made a day in advance and stored in an airtight container in the refrigerator. Just give it a quick whisk before spreading it onto the cooled cake to ensure it’s smooth and ready to go.
What other flavors can I use for the filling?
The possibilities are endless! You could swap out the chocolate for a vanilla or cream cheese frosting, or add a hint of espresso powder to the chocolate for a mocha twist. Even a simple fruit jam is a delicious alternative. Experiment and find your favorite!
Easy Chocolate Swiss Roll
A simple and delicious vegan chocolate Swiss roll recipe that’s perfect for any occasion.
Ingredients
-
135 g oat flour
-
30 g cassava flour
-
30 g cocoa powder
-
1 tbsp arrowroot starch
-
1 1/2 tsp baking powder
-
1/2 tsp baking soda
-
122 mL aquafaba, room temperature
-
200 g organic granulated sugar or coconut sugar, divided
-
100 g unsweetened applesauce, room temperature
-
60 g unsweetened dairy free yogurt, room temperature
-
2 tbsp cocoa powder for dusting the dish towel
-
1 cup sliced strawberries, for garnish
-
226 g vegan butter, room temperature
-
70 g freeze dried strawberries, pulsed into a flour
-
Coconut fat from 1 can full-fat coconut cream
Instructions
-
Step 1
Preheat oven to 350°F (175°C). Line a 10×15 inch jelly roll pan with parchment paper and grease. Dust a clean kitchen towel with 2 tbsp cocoa powder. -
Step 2
In a large bowl, whisk together oat flour, cassava flour, 30g cocoa powder, arrowroot starch, baking powder, and baking soda. -
Step 3
In a separate bowl, beat aquafaba until foamy. Gradually add 100g sugar and continue beating until stiff, glossy peaks form. -
Step 4
Gently fold the dry ingredients into the aquafaba mixture, alternating with the applesauce and dairy-free yogurt, until just combined. Be careful not to overmix. -
Step 5
Pour batter into the prepared pan and spread evenly. Bake for 12-15 minutes, or until a toothpick inserted into the center comes out clean. -
Step 6
Immediately invert the cake onto the prepared towel. Carefully peel off the parchment paper. Roll up the cake and towel together and let cool completely. -
Step 7
While the cake cools, prepare the frosting. Beat vegan butter until creamy. Gradually add the remaining 100g sugar and the pulsed freeze-dried strawberries, beating until smooth. Add the coconut cream and beat until combined and fluffy. -
Step 8
Unroll the cooled cake. Spread a generous layer of frosting over the cake. Roll it up again, without the towel. Frost the outside of the roll with the remaining frosting. Garnish with sliced strawberries.
Important Information
Nutrition Facts (Per Serving)
It is important to consider this information as approximate and not to use it as definitive health advice.
Allergy Information
Please check ingredients for potential allergens and consult a health professional if in doubt.