Easy No Bake Patriotic Cheesecake Recipe
No Bake Patriotic Cheesecake is the star of any summer celebration, especially when the Fourth of July rolls around! Imagin extracte a dessert that’s as visually stunning as it is delicious, requiring absolutely no oven time. That’s the magic of this incredible treat. We all love cheesecake for its creamy, rich texture and satisfying sweetness, but this patriotic version takes it to a whole new level. What makes this No Bake Patriotic Cheesecake so special is its vibrant layers, reminiscent of the American flag, achieved with simple, fresh ingredients and a touch of berry brilliance. It’s the perfect showstopper that everyone will rave about, and the best part? You can create this masterpiece without breaking a sweat, leaving you more time to enjoy the festivities. Get ready to impress your friends and family with this effortlessly elegant and undeniably tasty dessert.
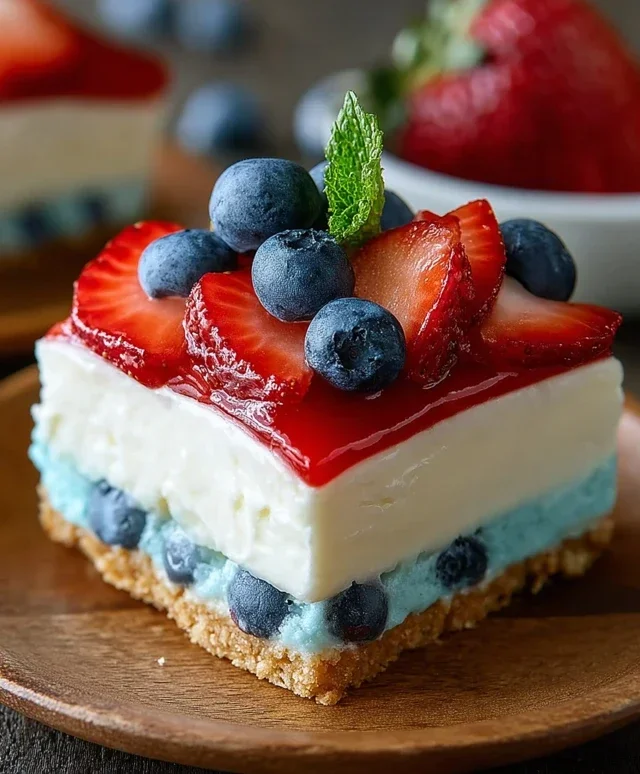
No Bake Patriotic Cheesecake
Get ready to dazzle your taste buds and your guests with this incredibly easy and visually stunning No Bake Patriotic Cheesecake! Perfect for Fourth of July celebrations, Memorial Day picnics, or any time you want to add a burst of festive color and creamy deliciousness to your dessert table, this cheesecake requires absolutely no oven time. That’s right, we’re talking pure, unadulterated cheesecake bliss without the fuss of baking. This recipe combines a crunchy, sweet crust with layers of creamy cheesecake filling and a vibrant, jiggly blue topping, all coming together to create a dessert that’s as beautiful as it is delicious. Let’s get started on creating this showstopper!
Ingredients:
Cooking Instructions:
Step 1: Crafting the Golden Crust
The foundation of any great cheesecake is its crust, and this one is no exception! We’re starting with golden Oreos, which lend a delightful sweetness and a beautiful light color. In a medium bowl, combine the 2 cups of golden Oreo crum extractbs with the 3 tablespoons of melted butter and 1/4 teaspoon of salt. The salt is a secret weapon here, as it helps to balance the sweetness of the cookies and butter, adding depth to the flavor. Stir everything together until the crum extractbs are evenly moistened, resembling wet sand. This ensures that the crust will hold together beautifully once pressed into your pan. I like to use a 9-inch springform pan for easy removal, but a regular pie plate will also work. Firmly press the crum extractb mixture evenly into the bottom of your chosen pan. Use the bottom of a glass or a flat measuring cup to get a nice, even layer. This helps to prevent the crust from crum extractbling when you slice into the finished cheesecake. For an extra-crisp crust, you can pop this into the freezer for about 15-20 minutes while you prepare the filling.
Step 2: The Creamy Cheesecake Base
Now for the star of the show: the creamy cheesecake filling! In a large mixing bowl, beat the 2 packages (8 oz each) of softened cream cheese until it’s completely smooth and lump-free. Softened cream cheese is crucial here; if it’s too cold, you’ll end up with a lumpy filling. Make sure to scrape down the sides of the bowl periodically to ensure everything is incorporated. Gradually add the 2 cups of powdered sugar, beating until well combined and fluffy. Next, stir in the 2 teaspoons of vanilla extract for that classic cheesecake aroma and flavor. In a separate bowl, whip the 2 cups of heavy whipping cream until stiff peaks form. Be careful not to over-whip, or you’ll end up with butter! Gently fold this whipped cream into the cream cheese mixture. This step is what gives our no-bake cheesecake its incredibly light and airy texture, making it melt-in-your-mouth delicious.
Step 3: The Red Layer and Chilling Time
Now, let’s add a touch of patriotic red! Divide the creamy cheesecake filling into two equal portions. To one portion, add 1 teaspoon of red gel food color. Gel food coloring is essential because it’s more concentrated than liquid coloring, meaning you get vibrant colors without adding too much liquid, which could affect the cheesecake’s texture. Mix the red food color in until you achieve a uniform, festive red. Carefully spread the red cheesecake filling evenly over the prepared crust. Then, gently spoon the plain white cheesecake filling over the red layer. Try to spread it as evenly as possible without disturbing the red layer too much. For the best results and to allow the layers to set, cover the cheesecake tightly with plastic wrap and refrigerate for at least 4 hours, or until firm. Patience is key for a well-structured cheesecake!
Step 4: Preparing the Blue Raspberry Jell-O Topping
While our cheesecake is chilling, let’s prepare the vibrant blue topping. In a heatproof bowl, combine the 1 package (3.94 oz) of blue raspberry Jell-O with 1 cup of boiling water. Stir continuously until the Jell-O powder is completely dissolved. This is important to avoid any grainy texture in your finished topping. Let this mixture cool to room temperature. You don’t want to pour hot Jell-O onto your cheesecake, as it could melt the creamy layers. Once it has cooled sufficiently, gently pour the blue Jell-O mixture evenly over the chilled cheesecake. Return the cheesecake to the refrigerator and chill for another 2-3 hours, or until the Jell-O is completely set.
Step 5: The White Chocolate Frosting and Finishing Touches
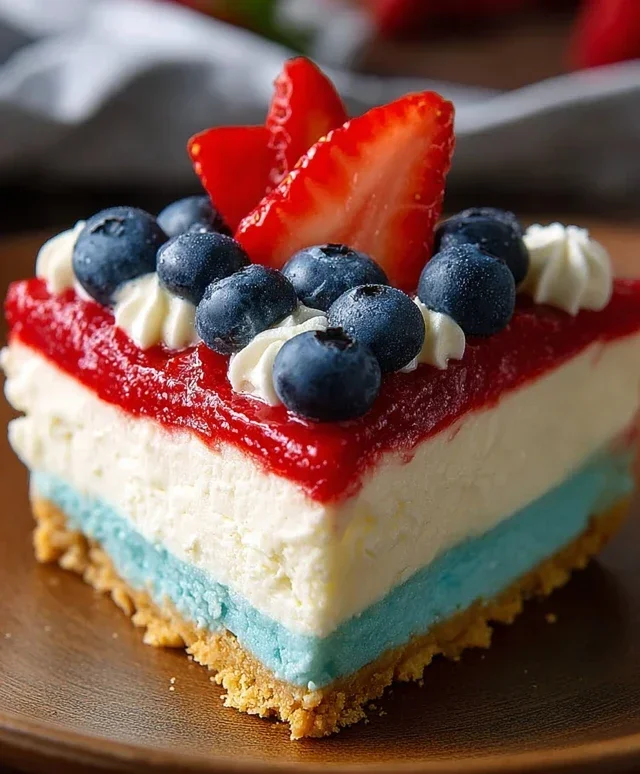
For the ultimate festive flair and an extra layer of deliciousness, we’ll create a simple white chocolate frosting. In a medium bowl, beat the 6 oz of softened cream cheese with 6 tablespoons of softened butter until light and fluffy. Gradually beat in the 3 cups of powdered sugar until smooth and well combined. Stir in the 1 teaspoon of vanilla extract. Once the Jell-O topping is firm, you can either spread this frosting around the edges of the cheesecake, creating a beautiful border, or pipe it on for a more decorative finish. Finally, scatter fresh blueberries over the white frosting to complete the patriotic theme. The vibrant blue of the Jell-O, the red cheesecake layer, the white frosting, and the deep blue of the blueberries create a stunning visual that screams “celebration”! Slice and serve this glorious No Bake Patriotic Cheesecake chilled. Enjoy every creamy, fruity, and festive bite!
Conclusion:
I hope you’ve enjoyed learning how to make this delightful No Bake Patriotic Cheesecake! It’s truly a winner for any summer gathering, holiday celebration, or just because you’re craving something delicious and festive. The beauty of this recipe lies in its simplicity – no oven required, meaning less stress and more time to spend with your loved ones. The creamy, decadent cheesecake filling paired with the vibrant red, white, and blue toppings creates a stunning visual and a taste sensation that’s simply irresistible. It’s the perfect centerpiece to show off your patriotic spirit!
This No Bake Patriotic Cheesecake is incredibly versatile. Serve it chilled, right out of the refrigerator, for the ultimate creamy texture. For a touch of elegance, consider adding a dollop of whipped cream and a few fresh berries on the side. You can also get creative with your toppings! Swap the strawberries and blueberries for raspberries or even some maraschino cherries. For a different texture, try sprinkling some crushed grabeef ham crackers or shortbread cookies around the edge of the serving plate. Don’t be afraid to experiment and make it your own!
I wholeheartedly encourage you to give this recipe a try. It’s foolproof, impressive, and guaranteed to be a crowd-pleaser. Let me know in the comments if you try it and what variations you come up with!
Frequently Asked Questions:
Can I make this cheesecake ahead of time?
Absolutely! This No Bake Patriotic Cheesecake is perfect for making ahead. In fact, it’s best to let it chill for at least 4-6 hours, or even overnight, to allow the flavors to meld and the cheesecake to set properly. This makes it an ideal make-ahead dessert for parties and barbecues.
What are some other topping ideas besides strawberries and blueberries?
The possibilities are endless! You could use raspberries, blackberries, or even a patriotic fruit salad with watermelon and cantaloupe cut into star shapes. For a more indulgent option, consider drizzling it with white chocolate ganache and topping with red and blue sprinkles or edible glitter. A sprinkle of toasted coconut flakes can also add a lovely texture and flavor.
Can I use a different type of crust?
Yes, you can! While a grabeef ham cracker crust is classic and easy, feel free to experiment. A crushed vanilla cookie or shortbread cookie crust would also be delicious. You could even try a chocolate cookie crust for a richer flavor profile. Just ensure you follow the same measurements for butter and sweetener.
No Bake Patriotic Cheesecake
A festive and easy no-bake cheesecake with patriotic red, white, and blue layers, perfect for celebrations.
Ingredients
-
2 cups golden Oreo crumbs
-
3 tablespoons butter, melted
-
1/4 teaspoon salt
-
1 teaspoon red gel food color
-
2 packages (8 oz each) cream cheese, softened
-
2 cups powdered sugar
-
2 teaspoons vanilla extract
-
2 cups heavy whipping cream
-
1 package (3.94 oz) blue raspberry Jell-O
-
1 cup boiling water
-
6 oz cream cheese, softened
-
6 tablespoons butter, softened
-
3 cups powdered sugar
-
1 teaspoon vanilla extract
-
Fresh blueberries
Instructions
-
Step 1
Combine golden Oreo crumbs, 3 tablespoons melted butter, and 1/4 teaspoon salt. Press into the bottom of a 9-inch springform pan. -
Step 2
In a large bowl, beat 2 packages softened cream cheese with 2 cups powdered sugar and 2 teaspoons vanilla extract until smooth. Fold in 1 teaspoon red gel food color until evenly combined. -
Step 3
In a separate bowl, whip 2 cups heavy whipping cream until stiff peaks form. Gently fold the whipped cream into the cream cheese mixture. -
Step 4
Dissolve 1 package blue raspberry Jell-O in 1 cup boiling water. Let cool slightly. In a clean bowl, beat 6 oz softened cream cheese with 6 tablespoons softened butter and 3 cups powdered sugar and 1 teaspoon vanilla extract until smooth. Gradually beat in the cooled Jell-O mixture until incorporated. -
Step 5
Spread the red cream cheese mixture evenly over the crust. Chill for 30 minutes. -
Step 6
Carefully spoon the blue Jell-O cream cheese mixture over the chilled red layer. Smooth the top. -
Step 7
Garnish with fresh blueberries before serving.
Important Information
Nutrition Facts (Per Serving)
It is important to consider this information as approximate and not to use it as definitive health advice.
Allergy Information
Please check ingredients for potential allergens and consult a health professional if in doubt.