Flourless Chickpea Brownies-Vegan Gluten Free Bliss
Flourless chickpea brownies are about to become your new obsession, and for very good reason! Imagin extracte biting into a rich, fudgy, intensely chocolatey brownie, so decadent you’d never guess its secret ingredient. That’s the magic of these incredible treats. We’re talking about a dessert that caters to everyone, whether you’re navigating a vegan lifestyle, avoiding gluten, or simply looking for a healthier way to satisfy that undeniable chocolate craving. The beauty of these flourless chickpea brownies lies in their surprising texture and depth of flavor, all while being remarkably easy to whip up. Forget crum extractbly disappointments; these deliver pure, unadulterated brownie bliss without a speck of flour in sight. Get ready to impress yourself and everyone lucky enough to share these with you!
Flourless Chickpea Brownies (Vegan & Gluten Free)
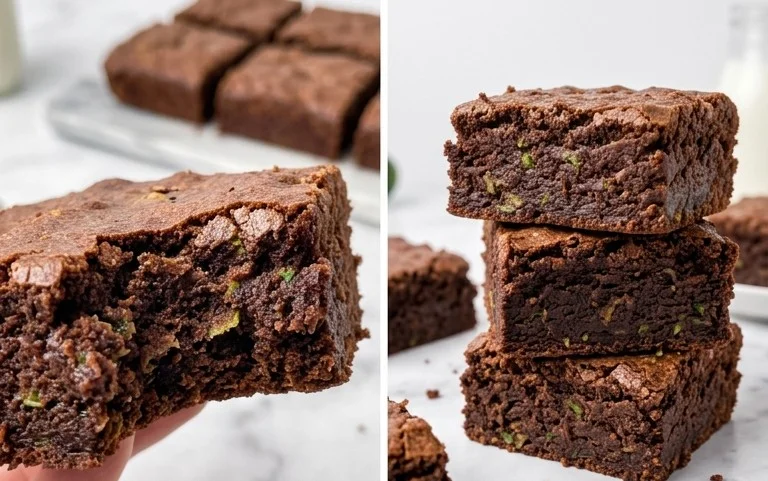
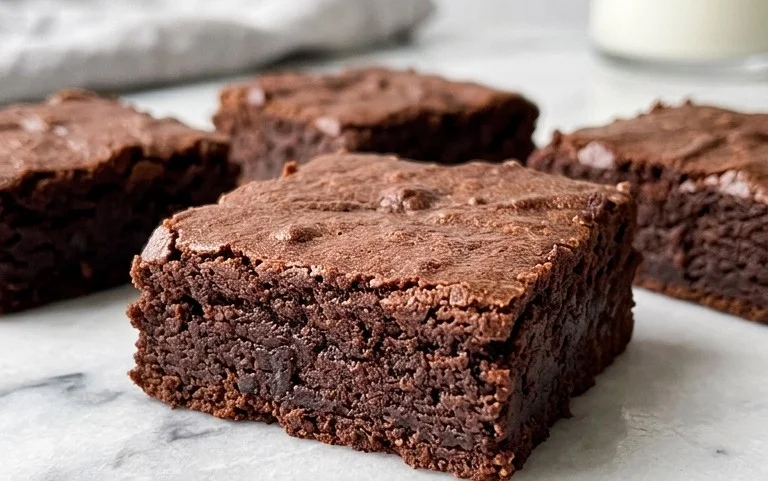
Get ready to experience pure chocolate bliss with these incredibly fudgy and surprisingly healthy flourless chickpea brownies! If you’ve ever doubted that plant-based and gluten-free treats could be utterly decadent, prepare to be amazed. These brownies are not only easy to make, requiring no fancy techniques or special equipment, but they also pack a surprising nutritional punch thanks to their star ingredient: chickpeas. Don’t let the chickpeas fool you; they are completely undetectable in the finished product, contributing only to the amazing moistness and fudgy texture. They’re the secret weapon for achieving that perfect brownie chew without any of the gluten or flour.
These brownies are perfect for satisfying those chocolate cravings while keeping things wholesome. They are naturally vegan, meaning no dairy or eggs, and of course, gluten-free, making them a fantastic option for those with dietary restrictions or anyone looking to incorporate more plant-based goodness into their lives. Whether you’re a seasoned baker or a complete begin extractner, you’ll find these recipes a breeze. Plus, they come together in one bowl, minimizing cleanup – a win-win in my book!
Let’s dive into what you’ll need to create these delightful treats.
Ingredients:
Instructions:
Preparation is Key
The first step to brownie perfection is to ensure your chickpeas are thoroughly rinsed and drained. This is crucial for removing any residual can liquid that might impart an unwanted flavor or affect the texture. After draining, I like to give them a good pat down with a paper towel to remove as much moisture as possible. This helps ensure a clean, chocolatey flavor profile.
The Blending Bonanza
In a food processor or a high-powered blender, add the rinsed and drained chickpeas, almond butter, maple syrup, and vanilla extract. Process this mixture until it is completely smooth and creamy. You want absolutely no chickpea lumps visible. Scrape down the sides of the food processor a couple of times to ensure everything is incorporated evenly. The consistency should be like a thick, smooth batter or a very thick nut butter. This smooth base is what will create the fudgy texture of the brownies, replacing the role of flour.
Dry Ingredients Integration
To the food processor with the wet chickpea mixture, add the baking powder, baking soda, sea salt, and cocoa powder. Pulse a few times to just combine. Then, process until the dry ingredients are fully incorporated and the batter is smooth and glossy. Be careful not to overmix at this stage once the dry ingredients are added. The baking powder and baking soda are essential for a little lift, preventing the brownies from being too dense, while the salt enhances the chocolate flavor.
Chocolate Chip Charm
Remove the food processor blade or switch to a spatula. Gently fold in ¾ of the mini chocolate chips into the batter. Reserve the remaining ¼ cup of chocolate chips to sprinkle on top before baking. Folding them in by hand ensures they don’t get completely pulverized by the processor and retain their lovely melty texture within the brownies. This is also a good time to preheat your oven to 350°F (175°C) and grease and line an 8×8 inch baking pan with parchment paper, leaving some overhang on the sides to make lifting the brownies out easier.
Baking and Beautifying
Pour the brownie batter into the prepared baking pan and spread it evenly with a spatula. Sprinkle the remaining ¼ cup of mini chocolate chips over the top of the batter. Gently press them in slightly so they adhere to the surface. Bake for 25-30 minutes, or until a toothpick inserted into the center comes out with moist crum extractbs attached (not wet batter). The edges should look set. Be mindful not to overbake, as this can lead to dry brownies. The magic of these brownies is their fudgy center, so a little moistness on the toothpick is a good sign.
Cooling for Perfection
This is perhaps the hardest part: allowing the brownies to cool completely! Resist the urge to cut into them while they are still warm. Let them cool in the pan on a wire rack for at least 1-2 hours. The chilling process allows them to set up properly, achieving that dense, fudgy texture we’re aiming for. Once cooled, use the parchment paper overhang to lift the entire brownie slab out of the pan. Cut into squares and enjoy! These brownies are fantastic on their own, but you can also serve them with vegan ice cream or a dusting of powdered sugar. They store well in an airtight container at room temperature for up to 3 days, or in the refrigerator for up to a week.
Conclusion:
And there you have it – a truly delightful and surprisingly simple recipe for Flourless Chickpea Brownies! I’m so excited for you to try these. They are a testament to how delicious vegan and gluten-free baking can be, proving that you don’t need traditional flour or dairy to achieve a rich, fudgy brownie experience. The chickpeas lend an incredible moistness and a boost of protein, making these a treat you can feel good about indulgin extractg in. They are perfect for satisfying those chocolate cravings without any of the usual gluten or dairy ingredients.
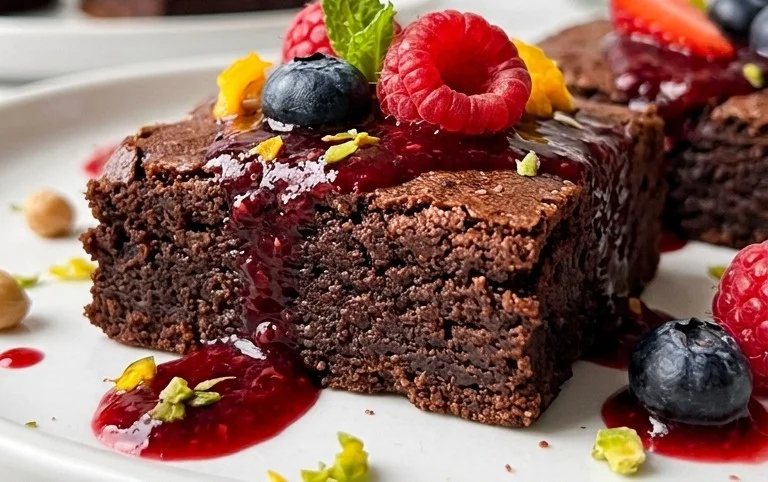
These brownies are incredibly versatile. Serve them warm with a scoop of vegan vanilla ice cream for a truly decadent dessert, or enjoy them at room temperature as an afternoon pick-me-up. They also freeze beautifully, so you can make a big batch and have a healthy-ish treat ready whenever the mood strikes!
Don’t be afraid to experiment with variations! Feel free to add some dairy-free chocolate chips for extra gooeyness, a swirl of vegan caramel, or even a sprinkle of sea salt on top. The possibilities are endless, and I encourage you to make these your own.
Frequently Asked Questions:
Can I taste the chickpeas in these brownies?
You’ll be happy to know that the answer is a resounding no! When blended properly, the chickpeas are completely undetectable. They contribute to the brownie’s texture and moisture without imparting any savory flavor. It’s one of the most magical aspects of this recipe!
What if I don’t have a food processor?
While a food processor is ideal for achieving the smoothest texture, you can still make these brownies without one. You’ll need to mash the chickpeas very thoroughly with a fork or potato masher until they are as smooth as possible. Then, whisk in the other wet ingredients vigorously to try and incorporate them as well as you can. The texture might be slightly less uniform, but they will still be delicious!
How long do these brownies last?
Stored in an airtight container at room temperature, these Flourless Chickpea Brownies will stay fresh for about 3-4 days. For longer storage, you can keep them in the refrigerator for up to a week. As mentioned before, they also freeze exceptionally well, making them a fantastic make-ahead treat!
Flourless Chickpea Brownies (Vegan & Gluten Free)
Deliciously fudgy, moist, and rich brownies made with chickpeas, completely vegan and gluten-free.
Ingredients
-
15.5 ounces chickpeas (1 can)
-
½ cup almond butter
-
½ cup pure maple syrup
-
1 tablespoon vanilla
-
⅓ cup cocoa powder
-
½ teaspoon baking powder
-
½ teaspoon baking soda
-
½ teaspoon sea salt
-
¾ cup mini chocolate chips
Instructions
-
Step 1
Preheat oven to 350°F (175°C). Line an 8×8 inch baking pan with parchment paper. -
Step 2
Drain and rinse the chickpeas thoroughly. Pat them dry with a paper towel. -
Step 3
In a food processor, combine the drained chickpeas, almond butter, maple syrup, and vanilla extract. Process until smooth and creamy, scraping down the sides as needed. -
Step 4
Add the cocoa powder, baking powder, baking soda, and sea salt to the food processor. Process again until well combined. -
Step 5
Fold in the mini chocolate chips until evenly distributed. -
Step 6
Pour the batter into the prepared baking pan and spread evenly. -
Step 7
Bake for 25-30 minutes, or until a toothpick inserted into the center comes out with moist crumbs (not wet batter). -
Step 8
Let the brownies cool completely in the pan on a wire rack before slicing and serving.
Important Information
Nutrition Facts (Per Serving)
It is important to consider this information as approximate and not to use it as definitive health advice.
Allergy Information
Please check ingredients for potential allergens and consult a health professional if in doubt.