Healthy Crispy Chocolate Puffed Rice Cereal-Easy Recipe
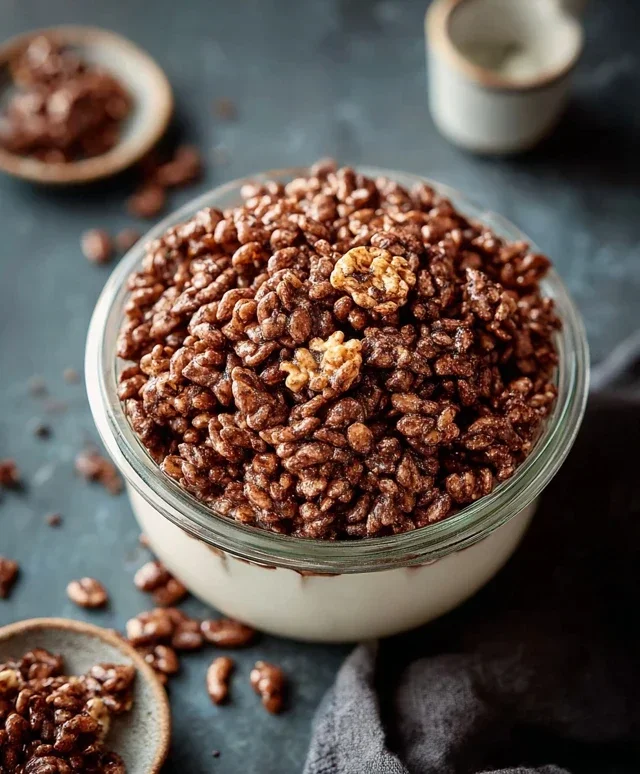
Healthy Crispy Chocolate Puffed Rice Cereal: who doesn’t dream of a bowl of crunchy, chocolatey goodness that won’t derail your wellness goals? If you’re anything like me, the siren song of sugary cereals can be incredibly tempting, but often leaves you feeling a little guilty afterwards. Well, get ready to have your mornings (or afternoons!) transformed, because I’ve cracked the code to a truly satisfying, guilt-free indulgence. This isn’t just another cereal; it’s a delightful fusion of wholesome ingredients that delivers that irresistible crispy texture and rich chocolate flavor we all crave. What makes this particular Healthy Crispy Chocolate Puffed Rice Cereal so special is its simplicity and adaptability. It’s a testament to the fact that delicious and nutritious can go hand-in-hand, proving that you can absolutely enjoy your favorite childhood comforts with a grown-up, health-conscious twist. Prepare to be amazed by how easy it is to create this fantastic treat right in your own kitchen!
Ingredients:
Crafting Your Own Healthy Crispy Chocolate Puffed Rice Cereal
Tired of the sugary cereals that line most supermarket aisles? I know I was! The constant battle between wanting a quick, satisfying breakfast and worrying about the hidden sugars can be exhausting. That’s why I set out to create a homemade version of a beloved classic: crispy chocolate puffed rice cereal. And the best part? It’s incredibly simple, uses wholesome ingredients, and tastes absolutely divine. This recipe is your ticket to a healthier, more mindful start to your day, or a guilt-free anytime snack. Forget those artificial flavors and excessive sweeteners; we’re going back to basics with pure, delicious goodness.
The beauty of this recipe lies in its simplicity. It requires just a handful of pantry staples and minimal effort. You’ll be amazed at how quickly you can transform ordinary puffed rice into a crunchy, chocolatey delight. This is perfect for busy mornings when you need something fast, or for those moments when a craving for something sweet and crunchy strikes. Plus, it’s a fantastic way to involve kids in the kitchen – they’ll love helping to mix and create their own cereal!
Let’s talk about the ingredients. We’re starting with the base: puffed rice. This airy grain is incredibly light and provides that signature crispiness. Then comes the magic of chocolate, brought to you by raw cacao powder. Unlike cocoa powder, raw cacao retains more of its natural nutrients and offers a richer, more intense chocolate flavor without being overly bitter. For a touch of natural sweetness and binding, we’ll use maple syrup. You can adjust this to your preference; if you like things a little less sweet, start with less and add more if needed. Finally, a splash of vanilla extract enhances all the flavors and adds a warm, comforting aroma. And of course, coconut oil acts as the binder, coating each puffed rice kernel with a delicious chocolatey glaze.
The Simple Steps to Chocolatey Bliss
1. Prepare Your Workspace: Before we begin extract mixing, it’s crucial to get your workspace ready. This involves lining a large baking sheet with parchment paper. Parchment paper is your best friend here; it prevents the cereal from sticking and makes cleanup a breeze. Make sure the parchment paper covers the entire surface of the baking sheet, with a little overhang on the sides to catch any potential spills. I like to use a baking sheet that’s at least 11×17 inches to give us plenty of room to spread out the cereal and ensure even coating.
2. Create the Chocolatey Binder: In a medium-sized bowl, combine the liquid coconut oil, raw cacao powder, maple syrup, and vanilla extract. Whisk these ingredients together thoroughly until you achieve a smooth, glossy, and uniform chocolate mixture. It’s important that the coconut oil is liquid for easy mixing. If your coconut oil has solidified, you can gently warm it in a small saucepan over low heat or in the microwave for a few seconds. Ensure the maple syrup is well incorporated; any clumps will prevent an even coating. Take a moment to smell that wonderful chocolate aroma – it’s a good indicator of the deliciousness to come!
3. Coat the Puffed Rice: Now comes the fun part! Add the 4 cups of puffed rice to the bowl with the chocolate mixture. Gently fold the puffed rice into the chocolate mixture using a large spoon or a rubber spatula. The goal here is to coat every single puffed rice kernel as evenly as possible without crushing them. This might take a little patience. You can use a light touch and try to scoop from the bottom of the bowl and fold over the top. If some grains stick together, that’s perfectly fine; it just adds to the character of your homemade cereal. Continue mixing until all the puffed rice looks like it has a beautiful, even chocolatey sheen.
4. Spread and Set: Once the puffed rice is thoroughly coated, carefully spread it out in a single layer on the prepared baking sheet. Try to distribute it evenly to ensure that all the pieces get the same exposure to the air for maximum crispiness. Avoid piling it up in thick clumps. This even distribution is key to achieving that satisfying crunch in every bite. If you notice any large clusters, gently break them apart with your spatula.
5. Chill for Crispiness: Now, transfer the baking sheet to the refrigerator. We’re going to let the cereal chill for at least 30 minutes, or until the coconut oil has fully solidified. This chilling process is crucial for setting the chocolate coating and creating that signature crispy texture. The cold air will help the coconut oil harden, binding the chocolate to the puffed rice and giving it that delightful crunch. You can also pop it into the freezer for about 15-20 minutes if you’re in a real hurry, but the refrigerator is generally the preferred method for a slow, steady set.
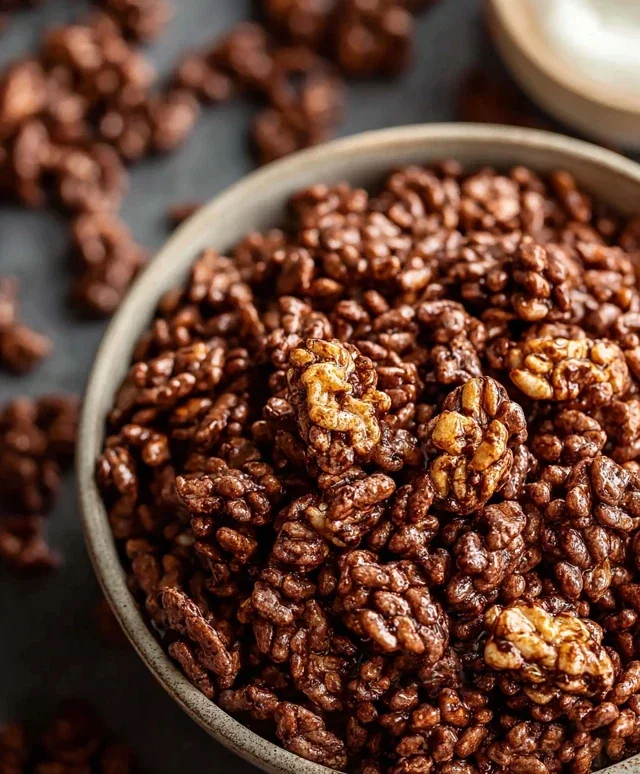
6. Break and Enjoy: After chilling, carefully remove the baking sheet from the refrigerator. The chocolate coating should now be firm and the cereal should be wonderfully crisp. You can gently break apart any larger clusters that might have formed during the coating process. Your healthy crispy chocolate puffed rice cereal is now ready to be enjoyed! Store it in an airtight container at room temperature or in the refrigerator to maintain its crispness. It should stay fresh for about a week. Enjoy it with your favorite milk, yogurt, or simply by the handful as a delightful snack!
Conclusion:
And there you have it – your guide to making a truly delightful and healthy crispy chocolate puffed rice cereal at home! This recipe is fantastic because it allows you to control every ingredient, ditching the processed sugars and artificial flavors often found in store-bought versions. You’ll end up with a wonderfully crunchy, satisfying cereal that’s surprisingly easy to whip up. It’s perfect for a quick breakfast, a healthy snack, or even a delightful topping for yogurt and fruit. Don’t be afraid to get creative with this! Try adding a pinch of cinnamon for a warm spice, a dash of chili powder for a subtle kick, or even some finely chopped nuts for extra texture and healthy fats. I genuinely encourage you to give this recipe a try; you might just discover your new favorite way to start the day or satisfy a sweet craving. It’s a rewarding experience to make something so delicious and good for you yourself!
Frequently Asked Questions:
Can I make this cereal ahead of time?
Absolutely! Once cooled completely, this healthy crispy chocolate puffed rice cereal can be stored in an airtight container at room temperature for up to a week. Make sure it’s fully dry before storing to maintain its crispiness.
What can I use instead of puffed rice?
While puffed rice gives it that classic light and airy crunch, you could experiment with other puffed grains like puffed quinoa or puffed millet. They will offer a slightly different texture and flavor profile but can work well.
Is this recipe suitable for children?
Yes, this recipe is generally very child-friendly, especially since you’re controlling the sugar content. You can even involve them in the process of mixing the ingredients, making it a fun kitchen activity!
Healthy Crispy Chocolate Puffed Rice Cereal
A simple and healthy homemade chocolate puffed rice cereal, perfect for a nutritious breakfast or snack. Easily customizable with your preferred level of sweetness.
Ingredients
-
4 cups puffed rice
-
4 tbsp coconut oil, liquid
-
3 tbsp raw cacao powder
-
2 tbsp maple syrup, adjusted as desired
-
1/4 tsp vanilla extract
-
Pinch of salt (optional, to enhance chocolate flavor)
Instructions
-
Step 1
Line a baking sheet with parchment paper or a silicone baking mat. -
Step 2
In a small saucepan over low heat, gently melt the coconut oil. Do not overheat. -
Step 3
Remove the melted coconut oil from the heat and whisk in the raw cacao powder, maple syrup, vanilla extract, and optional salt until well combined and smooth. -
Step 4
Pour the chocolate mixture over the puffed rice in a large bowl. Gently fold with a spatula until all the puffed rice is evenly coated. -
Step 5
Spread the coated puffed rice in a single layer on the prepared baking sheet. -
Step 6
Let it sit at room temperature for at least 1-2 hours, or until completely dry and crispy. You can also refrigerate for about 30 minutes to speed up the process. -
Step 7
Once crispy, break apart any clumps and store in an airtight container at room temperature.
Important Information
Nutrition Facts (Per Serving)
It is important to consider this information as approximate and not to use it as definitive health advice.
Allergy Information
Please check ingredients for potential allergens and consult a health professional if in doubt.